Showing posts with label Container Gardening. Show all posts

Tuesday, November 23, 2010

Waiting for my Nuts to Grow


There isn't much to report right now. Twenty-some containers, each containing two nuts, are out in the garden. I won't know until the Spring if they survive.


Another twenty-odd containers, each with two nuts, hides indoors behind the sofa.


In theory these should sprout any day now, if I haven't killed them. But the jury is still out. They sat in a baggie in the fridge, partially germinated, for a couple of weeks, with nothing but a damp paper towel to sustain them. Then I got them into the container, but didn't get them adequately watered for most of a week, thanks to wrangling a toddler at the same time.

Supposedly chinkapin don't do well in soggy conditions, so I'm crossing my fingers.

So far, the weed seeds are germinating nicely in the indoor containers. I guess that's a good sign. I'll need to use the bacon tongs to pull those out, but in the mean time, at least something is growing.

More ominously, in the one container where I gave Gabe some of my extra nuts and let him play, I can see a couple of the partially-germinated nuts peeking out of the soil, and they appear to be rotting. But in another container where my hasty watering dislodged soil, I can see what looks like new roots. So, fifty-fifty chance?

Friday, August 6, 2010

Growing grass


And here I was beginning to think I was nuts for hoarding my used nursery pots! This past weekend I potted up some native grass seedlings. Hah - "some". That's almost fifty pots of big bluestem (Andropogon gerardi), sideoats grama (Bouteloua curtopendula), and prairie dropseed (Sporobolus heterolepsis). You would think I'm trying to start a nursery or something.

If I do manage to grow them up into big grass clumps, I would like to give most of them to my local garden club for use in their plantings around the town, or to sell at a plant sale. I've been looking forward all summer to meeting up with them.

I suppose I should mention how I started the grass seeds: early in the summer I set up two enclosed milk jugs of each variety, winter-sowing style, and one open pot as a control. In all cases, the milk jugs did better because, I suspect, the soil surface stayed moist. The dropseed seemed a bit hesitant to germinate.

I also tried to start more pussytoes the same way. Although I got some germination, the seedlings all promptly fried in the brutal heat. I'm actually surprised that the grasses did so well.

Friday, July 9, 2010

Rain Barrel Water Conservation

Our stacked rain barrels hold a total of 108 gallons of water when they are full, and at the start of this dry spell we've been having in Franklin they were full. We have them setup so they also collect water that our air conditioning unit produces every day, giving us a steady inflow of several gallons. At this point we're down to the last twenty or so gallons in the tanks, which will hopefully fill up again if it rains tomorrow.

The water barrels have been the only source of water for my borrowed earth boxes which combine to consume around 8-9 gallons of water a day. Those nearly seven foot tall tomato plants are thirsty beasts in this heat. We probably use another couple gallons watering the plants at the water station and Michelle's seedlings/transplants. With the additional input from the air-conditioner we've easily saved two-hundred gallons of water use that would have otherwise come out of the tap.

If everyone in Franklin took advantage of similar rain barrels to water their gardens with during this drought we could have combined to save a little over 7,500,000 gallons of water, which surely would have helped our over-burdened aquifer!

Many rain barrels I've seen only have a spigot a half a foot or so up from the base of the barrel, effectively cutting off many dozens of gallons capacity. While our rain barrels from Arid Solutions weren't cheap, they are very well designed, with multiple output spigots at different levels and overflow spigots at the top. The main source of water comes out of the base of the barrels through the green hose.

The fact that the spigot comes out the base of the barrels means we have access to all the water in them, and the other important aspect of our water station is the hose drops several feet to where we access it. This differential in height gives us great water pressure for a rapid flow. Filling a gallon jug takes about twenty seconds or so through this filling method, while using the brass tap mounted higher on the barrel takes much longer. If you do get a rain barrel consider placing it where you have a natural incline to take advantage of, or put it up on cinder blocks to give it a height boost.

The first year we had the rain barrels we didn't use them as much as we do now. Adding the hose that comes out of the bottom with a valve on the end of it made all the difference. It lets us take the hose where we want it and turn it on/off where we are. The hose and the valve cost a little extra, but combined with the height differential they make a world of difference in accessibility and flow rate over the generic spigot out of the side of the barrel. Happy conserving, and please everyone do a rain dance! ;)

Monday, June 28, 2010

What a Difference a Vacation Makes


If you have an awesome neighbor who takes great care of your plants while you're away, then going away for a week can be an amazing experience. When you see your garden every day it can be hard to appreciate just how much is going on. The above image is of the garden when we left for Texas ten days before this next image.

The corn literally exploded while we were gone, going from about shin high to waist high. Having never grown corn before the growth is unreal for me to behold.

Here is another view of the corn from before...

...and after. I pulled back a little on this image to show how the tomatoes are also taking off. The hot weather has really been what the garden was waiting for. While I still haven't put the Solar Pod to any use aside from killing things, the Solar Cones did a great job of accelerating the various melon plants.

I've tried watermelon half-heartedly before and failed miserably at it. These three watermelon plants are already doing way better than anything I've grown before and it isn't even July yet. The early melon varieties are already flowering, though I failed to get a good picture of them. All in all I'm very pleased with how the cones helped them along through. the cool spring weather

I really like interplanting, but it occasionally goes horribly wrong when you're planting new varieties. I'll have to wait for fruit set to tell you which variety of squash I planted with my pole beans, but they are out of control. The saving grace is one of the vines can train through the corn, another through the garlic, and another through some empty space left by the failed parsnip bed. With the length of the vines already I have doubts as to my ability to keep them free of vine borers. I've killed two adults already that were tanking up on the nearby milk-weed flowers, but I know if I've killed two there are many many more laying eggs, which are damned hard to find.


The Earth Box tomatoes continue to do very well. The black cherries are taller than me now with the help of the box, and about as tall if you take the box away. I'm 6'5" so they're doing great for New England. Though I'm not sure how I'm going to support any additional growth. I'm holdining a harvest of snap peas. Oregon Sugar Pod II to be exact. I can't say enough good things about this variety of pea. They taste great even when you harvest them late, as I did since we were away. They're incredibly prolific, compact, and heat tolerant. While I'll keep trying new varieties this is a staple for me.

Here I am tucked in amongst the corn, with the Oregon Sugar Pod II Pea plants in the foreground.

The happy gardener has many peas!

Monday, May 31, 2010

Franklin Beautification


I had always wondered how they kept the flowers in these boxes from drying out. Now I know: there is a built-in drip irrigation system. Last weekend I attended Franklin's Beautification Day, where I helped the garden club and other volunteers put flowers into these and other planters in our downtown.

I have to say, I feel a little lost when it comes to standard non-native garden plants, but the garden club members were a lovely bunch. They really bring a needed touch of beauty to our town center, and I didn't get any funny looks from them when I talked about native plants. I had such a good time working with them that I'll be going back for more! Garden club, here I come.

Monday, April 19, 2010

So Much Gardening!

We spent a downright decadent amount of time gardening today. I moved some dirt into the veggie garden for Chris (though by far he did the bulk of the work), I moved the compost explosion into the shiny new compost bin, and I gave the front shrubs a much-overdue haircut. (With old-fashioned clippers, I must add. Finally, my spring exercise regime is here!)


One year ago, a friend sent me home with half a dozen branches from one of her shrubs, which she had been forced to hastily chop to accommodate construction workers. She said "shove them in the ground and they'll grow!" I did, and one of them took. You can see it in this picture there on the left. Now if only I could remember what it is.

I had noticed that wherever the silky dogwood is crushed to the ground by fallen branches, it roots and grows new shoots, so it occurred to me that I could root some native plants by the shove-in-the-ground method. So in this otherwise useless muddy patch, I have made rows of silky dogwood, witch hazel, crab apple, spice bush, and honey locust. Perhaps in a year's time I'll have some little trees to share.


While collecting cuttings from our crab apple, which is inconveniently behind the shed, I tripped over this: a yew shrub which had been dumped to die, but which was still clinging to life. The trunk is gnarly and it has a root that looks like the leg of a dragon, so I figured why not stick it in a pot, and call it an ugly bonsai? I want to improve at container gardening, so this seems like a suitable subject. Poor shrub!


Gabe helped me revamp the birdbath area. He helped me load many buckets of rocks for this. Chris snapped the photo before I put plants in the pots, but they need some time to fill in anyway. Gabe made his first solo exploration of the swamp path while I dug violets, and the other pots now contain wild strawberry and bee balm.

I was going to remove the eyesore basketball backboard today, but somehow, I never got around to it.

Friday, June 5, 2009

Mmmm, green beans!

Picked my first handful of green beans from my Earthbox. Unfortunately, aphids are attacking fiercely - so I have to keep spraying my homemade insecticidal soap every few days to keep the population down.

Here's my bean harvest:
Bean Harvest

Monday, May 25, 2009

An Earthbox Memorial Day

My goal for today was to try to get my remaining, empty Earthbox filled. I was planning on planting leeks in it - but after stopping at all of the garden centers over the past few weeks (and again today), I gave up my search for leek seedlings. So, I thought that I would try to start them from seed - ran over to find a packet...and there were none!

Argh!

I suppose I'll have to catalog order them next year and start them myself. Instead of leeks, I decided that Earthbox #5 would be an experimental box (last year, I experimented with watermelon). Rather than trying something exotic (like watermelon...for this region) again, I wanted to attempt a root vegetable. I picked up a packet of Burpee carrot seeds: short, sweet, 4-5" long ones that won't get caught up in the grid at the bottom of the Earthbox. I sowed them directly into the box, 2-3 per hole. I'll thin them out when they pop up. Hopefully I'll get around 25-30 carrots in the box.

On the pest note - I'm also seeing aphids and spider mites hanging around my tomato plants and peas more, so I sprayed more of my insecticidal soap on all of the plants.

I have green beans forming:
Baby Green Beans

Yay :)

My roma tomato plants haven't yet reached their cage/netting yet, so I had to support them with a bamboo stake until they get tall enough to start weaving them into the netting. They have also started setting some early fruit!

Little Roma

I can't wait to taste em!

Wednesday, May 20, 2009

An Earthbox Update - 2 1/2 Weeks Later

I've been sick. Ick. It's left me too tired to do anything much. Thankfully, the Earthboxes do not need much care.

I did lose one romaine plant, possibly either 1) due to me over pruning it for salad or 2) due to a mold I found near it, that I pulled from the box before it got to the other plants. The other lettuces are fine though.

I was able to plant up some peppers during my various colds - so Earthbox #4 is now half filled. The remaining space in it is for a lonely Black Cherry tomato plant that C4 and Michelle have waiting for me once I am well enough to pick it up. I'm still looking for leek seedlings to put in my remaining box, hopefully those will be coming into a garden center soon.

I've not had much trouble with pests yet. I made my own insecticidal soap (using organic handsoap) and the chocolate mint plant I bought has been keeping most of the other pests away. I hope that continues to work!

My blueberry bush continues to do well. It looks like I will have a ton of blueberries to try out this year:


And for the star of this post - my Green Bean and Snap Pea Earthbox has been going crazy. With the last post, they were barely 4 inches tall. Now look!

(The snap pea side. The green beans are almost as tall on the other side!)

The plants are also both flowering, so I should be getting veggies set on them soon!

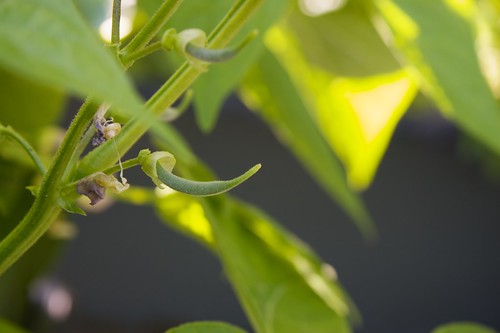
Green Bean Blooms
(Green Bean Blooms)


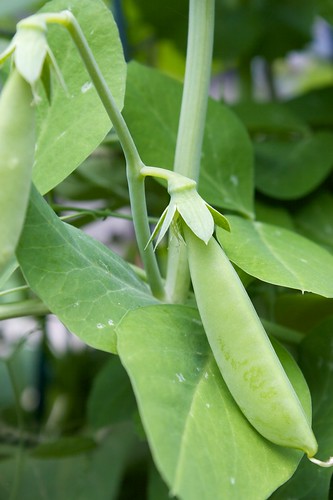
Sugar Snap Pea Bloom
(Sugar Snap Pea Bloom)

The sugar snap pea and green bean bloom pictures have bigger sizes up on Flickr, just click the pictures to take you to my Flickr page.

Saturday, May 2, 2009

A New Clueless Gardener!

Hello there!

Chris and Michelle asked if I could contribute to their blog, since I have been gardening a bit too - plus it's fun to have someone else to blog with too. :)

Since I don't have a yard (I rent), my mother bought me a couple of Earthboxes last year. I was pretty dubious about them at first, but I decided to try them out. I planted two tomato plants in one box and six bell pepper plants in the other. They loved the boxes and grew crazily, regardless of me planting them too early (resulting in me having to move the boxes indoors for a few weeks). I bought another to experiment with watermelon, but I ended up planting them too late. In the end though, I had tomatoes galore. I ate them fresh, cooked them onto sauces, used them for salsa, gave some away. I had peppers coming out of my ears. I used them in every recipe I could think of and begged people to take them (since they already had more at home).

This year, I have five boxes. Three of the boxes are currently planted, so here's what my patio looks like right now (I just finished the tomato box):


From Left to Right:
Earthbox #1 contains 2 Roma tomato plants. The support structure has netting for it to climb on. The structure is the add-on kit for the Earthbox and it cost a pretty penny. This will be my first time using it, so I hope it will be worth it. I used cheap tomato cages last time.

(One of my roma tomato plants being guarded by my trusty companion)

Earthbox #2 contains 2 Arugula (which is about to bolt), 2 Iceberg Lettuce, and 4 Romaine plants. This was the first box I started and I've already been able to harvest from it (as you can tell from its overflowing contents). I may have to yank up the Arugula and replant it with red lettuce if it keeps trying to bolt. The Iceberg won't form a head, so I gave up and just started harvesting it too.


Earthbox #3 contains 10 Sugar Snap Peas and 10 Green Beans. They are supported by a tee-pee structure of bamboo sticks. I spent today weaving twine around the sticks for the pea side. There's also a line of twine supporting the backsides of the Green Beans, just so they don't lean over, since it's been windy.


The other two Earthboxes are to the left (not in the photo) and will eventually contain Leeks in one and a mix of bell peppers and a Black Cherry tomato plant in the other (since I've learned that six bell pepper plants is about two bell pepper plants too many).

I also have a blueberry bush in the large container on the far right. Behind it is a strawberry pot. Both were gifts from Chris and Michelle. The blueberry bush is already blooming!

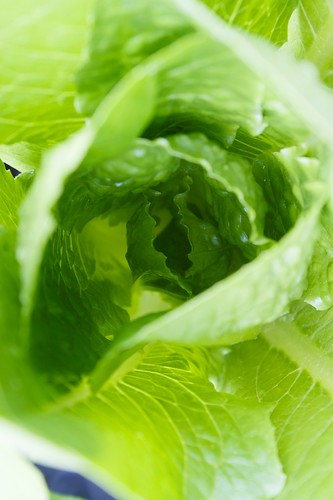
And now for this week's beauty shot, a picture of one of my Romaine plants (also available in various sizes on my Flickr page):