Friday, February 29, 2008

Field Report

I'm a perfectionist but I don't believe in worrying about getting something right the first time. People are good at learning from their mistakes, well at least some people, but most people aren't very good at planning ahead to prevent those mistakes from happening. After you know how to do something you damn well better do it right, but while you're learning mistakes will be made. We've definitely learned some lessons from our first go at starting seeds. The most important lesson is the shear joy we both get from watching seeds spring to life.


A little over a week and a half ago we started up our first seed tray, and it's gone well though far from perfect. I decided to pickup a couple of Burpee's Ultimate Home Growing Systems because the allure of just having to top off a reservoir of water once a week or so was too strong to not try it. The seedling kits were a present to myself, Michelle had bought me a Grow Shelf for my 30th birthday. I had contemplated attempting to build my own grow-light shelf system, but I was very happy to have a kit to assemble. It fits nicely in the corner of our sunny living room.


We started our first batch of seedlings a couple weeks earlier than we probably should have mostly to allow time for a round of failures. Luckily our success rate seems to be better than 0% on this first go. I did learn that as ready to go as the Burpee trays look they need a good round of cleanup first before they're ready for action.A couple dry cells in the first batch baffled me, until I started on the second tray and realized how many of the plastic holes that had been punched in the bottom of each cell were still in place.


I made sure to punch out all of the plastic holes on the second tray, so hopefully there will be no watering failures. The whole water reservoir did get me thinking of how expensive the seedling heating pads are, and how a small 50 watt fish tank heater could easily do the same job for a tray. For the second batch I decided to throw caution to the wind and give it a go with the (submersible)heater set to keep the water at 78 degrees. I was worried about direct contact between the heating element and the plastic so I wrapped the bottom in aluminum foil to prevent direct contact. I'll let you know if it melts through the bottom.


The new tray is seeded and ready for growing, so I'm hoping the heating helps speed things along and nothing goes catastrophically wrong.


Michelle took a couple pictures of me seeding the new tray. It would probably be easier to do this on a table, but despite being 30 and 6'4" I can still curl up into a ball so I'm going to enjoy it while I can. Though I might look deadly serious, I was finding playing in the dirt while there is still snow on the ground outside to be childishly delightful.


Since I only have one heater I'm going to try to keep day by day pictures of the heated tray for comparison with the unheated tray when we transplant out the first batch to larger containers. The various incarnations of those larger containers will be enough material for several future posts. Recycling at its best!

Saturday, February 23, 2008

Milk-Jug Greenhouses


Here are those milk-jug greenhouses I mentioned in an earlier post, and a picture of my little grass seedlings! I can't wait to try this with other plants. This has worked so well that I have upped my milk-drinking just to generate more empty jugs.

Hamamelis virginiana, a.k.a. Witchhazel


Witchhazel

Now I know why this plant has been associated with witches: it blooms in the winter! Or more precisely, in November, after the leaves have dropped from its branches.

The flowers are small and yellow, made up of delicate threads that drop away after a few weeks, and a tougher little cup-like shape, that persists throughout the winter. This makes them very easy to identify on snowy winter days.
This picture shows the cup-portion of the tiny flowers against a backdrop of snow.
The other oddity about witchhazel is that it is one of the only plants that bears its fruits, flowers, and buds all at the same time. However at this time of year the empty hard shell of the fruits seem to have dropped off. I need to watch them more closely next year, because, apparently, the seed pods pop open violently enough to fling the seeds many feet! This may make it difficult to collect the seeds. . .
We have at least four witchhazels along the edges of our marsh, including a grand specimen that is about fifteen feet tall and just as wide, and as perfectly round as any anal retentive gardener could want. (Which I find amusing, because I am anything but.)

Toxicodendron Vernix, a.k.a. Poison Sumac


Poison Sumac

Poison sumac fascinates me. I have found about half a dozen small specimens back in the marshy portions of our yard, where they are welcome to stay. I’m still on the fence about the large one, however, since it is growing where people or pets on the rear lawn could accidentally come into contact with it. I’ve decided to give it until next winter to decide whether it gets killed or just trimmed. The birds enjoy the berries and during the summer use it as shelter from which to scope out the bird feeders. The foliage in the Autumn was a glorious red.

The picture below shows a cluster of the sumac's dried berries, which still decorate most of the branches. These berry clusters make the plant easy to identify in the winter.


I’ll undoubtedly write more about our toxicodendron conundrum in future posts.

Symplocarpus foetidus, a.k.a. Sunk Cabbage


Skunk cabbage

The marshy portion of our yard is so filled with skunk cabbage that I can’t walk across it without accidentally crushing their overwintering sprouts! Which makes me feel terrible because these are slow-growing and long-lived plants, and I’m not sure that they can recover from having their primed growing-point crushed.

Skunk cabbage grows only in sopping-wet soil, and each Spring they put out copious quantities of wide green leaves, which rot away abruptly in the heat of the Summer. But it’s their blossoms that are the most interesting. They sprout up alongside the plant’s sprout in the late winter and actually melt their way through the ice. That’s right: they give off heat. This is to attract the very first insects of the season.

This photo shows a skunk cabbage sprout, on the right, looking a little bent, perhaps, from being stepped on. (Sorry little plant!) On the left is the flower. Maybe later this month I’ll get a photo of one of these popping up through the snow, but right now the snow is too deep except for where there is flowing water.

These lovely plants have a terribly undeserved name. They don't stink!


Friday, February 22, 2008

More Snow

It’s snowing again, gosh darn it! I’ll be amazed if we have another sudden thaw this weekend, so it’s indoor gardening and rowing machine for me again.

A few weeks ago out of desperation to grow something, I converted plastic gallon milk-jugs into mini-greenhouses for the window. I’m using them to grow plugs of grass for our pathetic lawn. The grass seeds were supposed to take between nine days and three weeks to germinate, but the jugs must provide ideal growing circumstances, because at six days I could see stars of “mold” around the seed-ends that was, in fact, roots! I can’t believe how exciting it is to watch grass grow at this time of year. (Though I suppose this shouldn’t surprise me much, seeing as my former hobby was watching paint dry.)

Our lawn was in an amazing state of neglect when we moved in. At that time it was a mix of crabgrass and weeds. I did laps around the yard with a bucket, and got rid of most of the weeds, and the drought at the end of the summer thinned out the crab grass down so low that the dirt shows through. Yuck.

A bit of digging demonstrated that the topsoil is at most six inches deep, and below that is sand and rock, Further yuck.

Chris and I have on and off been researching lawns, and have been looking into various approaches to healthy lawns. We would like an organic lawn, and I would particularly like something that is native and not a monoculture that is useless to the local wildlife. But I have been hard-pressed to find anything native that makes a decent lawn. So, we’ve got a bag of some standard grass seed that isn’t native, and we’re thinking of adding Dutch white clover seeds to the mix. I’ve transplanted four good two-foot-by-two-foot chunks of sod from the garden, as an experiment, and I’ll have my eight indoor-grown plugs by the time Spring rolls around. Maybe if we add compost a bit at a time and continue to fiddle with seeds and plugs, the lawn look better in a few years.

We did contemplate adding six inches of good dirt to the entire lawn, but the vegetable garden stole Chris’ attention, and I can’t say that that upsets me!

Thursday, February 21, 2008

Honeylocust, Sticks, and Frozen Dirt

Even though there was a dusting of snow yesterday morning, I was able to work the soil. But alas! The temperature plummeted last night, so the ground was iron-hard and undiggable again this morning. It was too cold even to sulk around outside wishing for Spring.

As long as the weather cooperates, I plan to spend an hour each morning before work turning over the new vegetable beds. Digging turns out to be a comfortable sort of exercise for me while pregnant, at least for now. My alternative is Chris’ rowing machine, which is all well and good; I just prefer exercise that also happens to get something done. Maybe because I spend my work days in a dark room at a computer, but I love manual labor outdoors, even in the cold or the wet or the heat.

Last weekend in desperation for a thaw I started moving sticks around in the woods. It was really just an activity to cure me of the fidgets, but there was something about rounding up the deadfall that made me feel like I was laying claim to our bit of woods. It did hammer home that Winter is really the one time that all of our backyard is fully accessible. Once the plants start to green up, various parts of the woods will either be too muddy, too dense and tic-filled, or too full of poison ivy or poison sumac to venture into.

I discovered a new type of tree while lurking about back there: honeylocust. There are two saplings back there. They appear to be suffering from a fungus, unfortunately, but hopefully with a bit of trimming they’ll recover. Honeylocust is a native tree whose wood is sometimes used in furniture-making and as firewood, but it isn’t common. In fact, it looks downright exotic, because it is covered in two-inch-long thorns. I’m guessing the thorns are what prevent it from being planted much as an ornamental, because they are capable of puncturing tires as well as feet. They also have a particularly short lifespan for a tree: 120 years or so. But they are excellent in city sites, because they do well in poor growing conditions, apparently, which is why I’ve only ever seen them growing in downtown Providence.

I love learning this stuff.

Monday, February 18, 2008

A Lucky Find

Today was unseasonably warm, which was great for us because it gave us an opportunity to get out and do some digging. It had rained most of last night and with temperatures making it to nearly sixty the ground thawed well in most places. Michelle made it out first and decided to work on the row along the fence.


This lead to a great discovery, the soil along the fence is around a foot of decent loam. It's still light on organics, but its composition is overall very good. Though we've both read up on various lasgna non-digging techniques growing up I always helped my mom make garden rows by flipping sod upside-down so that's the approach we used here. With the soil being nice and deep this was a very quick and easy process as digging goes, at least compared to what we're used to in this yard. Most of the yard has ground like you'll see below.


While there is nothing for scale the topsoil is about four-six inches thick, with densely packed sand and rocks underneath that. Since we want at least a foot of reasonable soil this mean we have a lot of rock and sand excavation which is much slower than moving around good soil. This afternoon we turned over around 148 Cubic Feet or about 5.5 Cubic Yards of soil. Last year over several days of digging we managed to turn over/create about 3 Cubic Yard of Soil in our first row.


In the picture below you can see Michelle standing victoriously before the new row along the fence. You can see last years row in the foreground, and you can see the hole I took the cross section picture in next to the wheelbarrow. I had hoped to dig out more of that, but the ground was still too frozen. It will receive full sun in the summer, but with the sun lower this time of year it doesn't get as much. We need to finish that section, because come Saint Patrick's Day we'll be planting the peas there.


Michelle did a lot of clearing of dead brush out of the woods this weekend and lined our little horse-shoe path with dead fall. You can also see a critter pile of sticks we've made. We fully accept that we're going to lose some of the garden to bunnies, raccoons, deer, skunks, and the like. We take it as a small price to pay for the privilege of looking out our back windows and seeing them in action.

Saturday, February 16, 2008

In The Beginning

Last year my wife and I moved into our first home, and among the very first things we did was to dig the first row of our garden. I wanted to transplant the potted garden I had from our apartment that was suffering badly from not enough sun and to many pests.

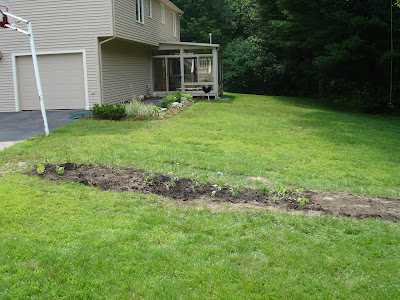
In the end we had a row a little over 25' long and 3' wide with a number of tomatoes, peppers, eggplants, and some cucumbers.


It had a rough go of it through some hot dry weather followed by torrential rains, but eventually grew healthy enough to bear a small harvest. The biggest producer was our cherry tomato plant that kicked out well over a hundred sweet little cherry tomatoes that made for nice light breakfast snacks on the way to work.


I should note that the soil around here is full of large glacial rocks and boulders. After about 6" of topsoil we dug out another 6" of rocks and sand. We removed the rocks and mixed the sand with loam. We removed a lot of rocks, enough to build a small wall with the help of some other rocks we found about the yard. Those are various blueberry and blackberry bushes behind the wall.


By my math, last year we moved around roughly 2 cubic yards of soil, sand, and stones to create our little row. This year we plan to expand the garden exponentially. We're looking to excavate 12 cubic yards of topsoil, 12 cubic yards of sand and rocks, and replace the sand and rock with 12 cubic yards of new loam. It'll be a little tricky since my wife is already four months pregnant, so I'll be doing all the heavy lifting but the payoff this fall will be well worth the effort. Beyond that we know it'll be a project that pays off for years to come.

This blog will be a journal of how our efforts go this year, our first full year of having a real garden.